CHOOSING THE COSTUME
 |
| Photo: Milos Mlady photography |
It all started with the release of the cinematic tailer to the For Honor game, where Apollyon was introduced in 2016. I absolutelly adored the way she looked, the way she spoke and what she had to say. She was a very appealing villain I've never seen before and I decided I wanted to cosplay her. It took me a lot of time to research and I tried to contact a lot of people from Ubisoft to help me out with referrences, but I was able to fully work on her costume the year later when the game was released.
ORIGINAL CHARACTER

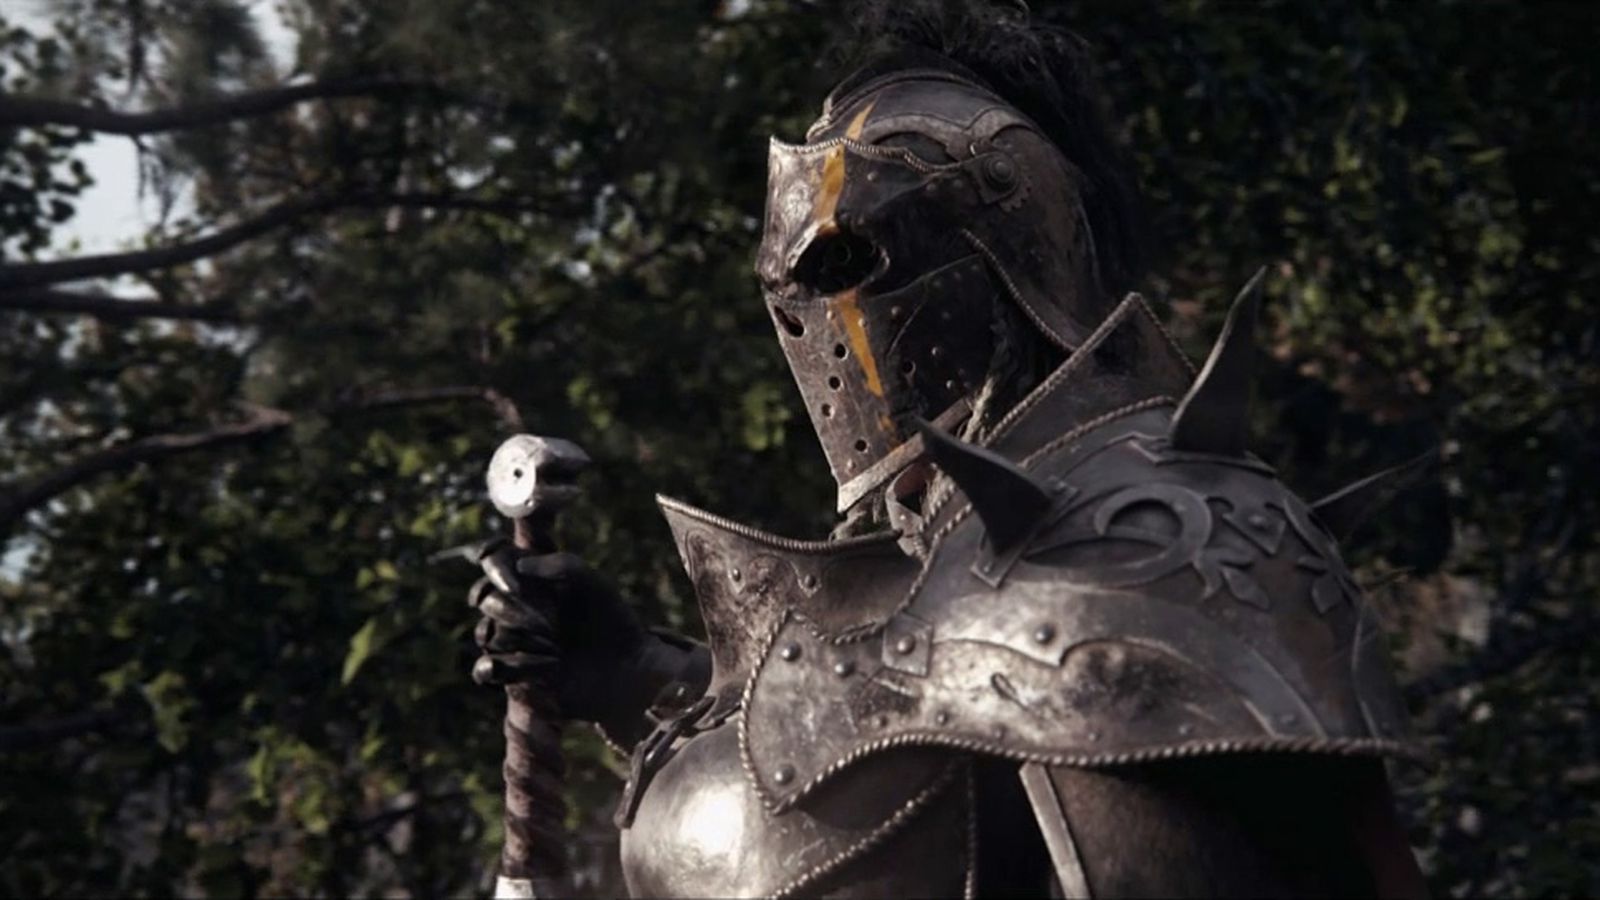 |
| Apollyon's first trailer appearance featured a different helmet, pauldron and cape |

MAKING THE COSTUME
1) The cape
 I searched for a very roughly woven fabric, but I hadn't much luck, till I saw THIS BLANKET (Gurli) in Ikea, which had the perfect structure for this costume.
I started with dyeing the fabric darker, because even it is grey, the color is a little too light for what I needed. Then I ironed it, cut it in the desired shape. For the shape you need, there is a great pattern picture, that I use:

I needed the shape to be somewhere between the first and the second type, so I just had to cut the sides a little. Then I weathered the cape with lighter, scissors and metal brush to look teared + airbrushed it with black acrylics to look more worn. Then I added her yellow patterns, which I painted by hand with acrylics.
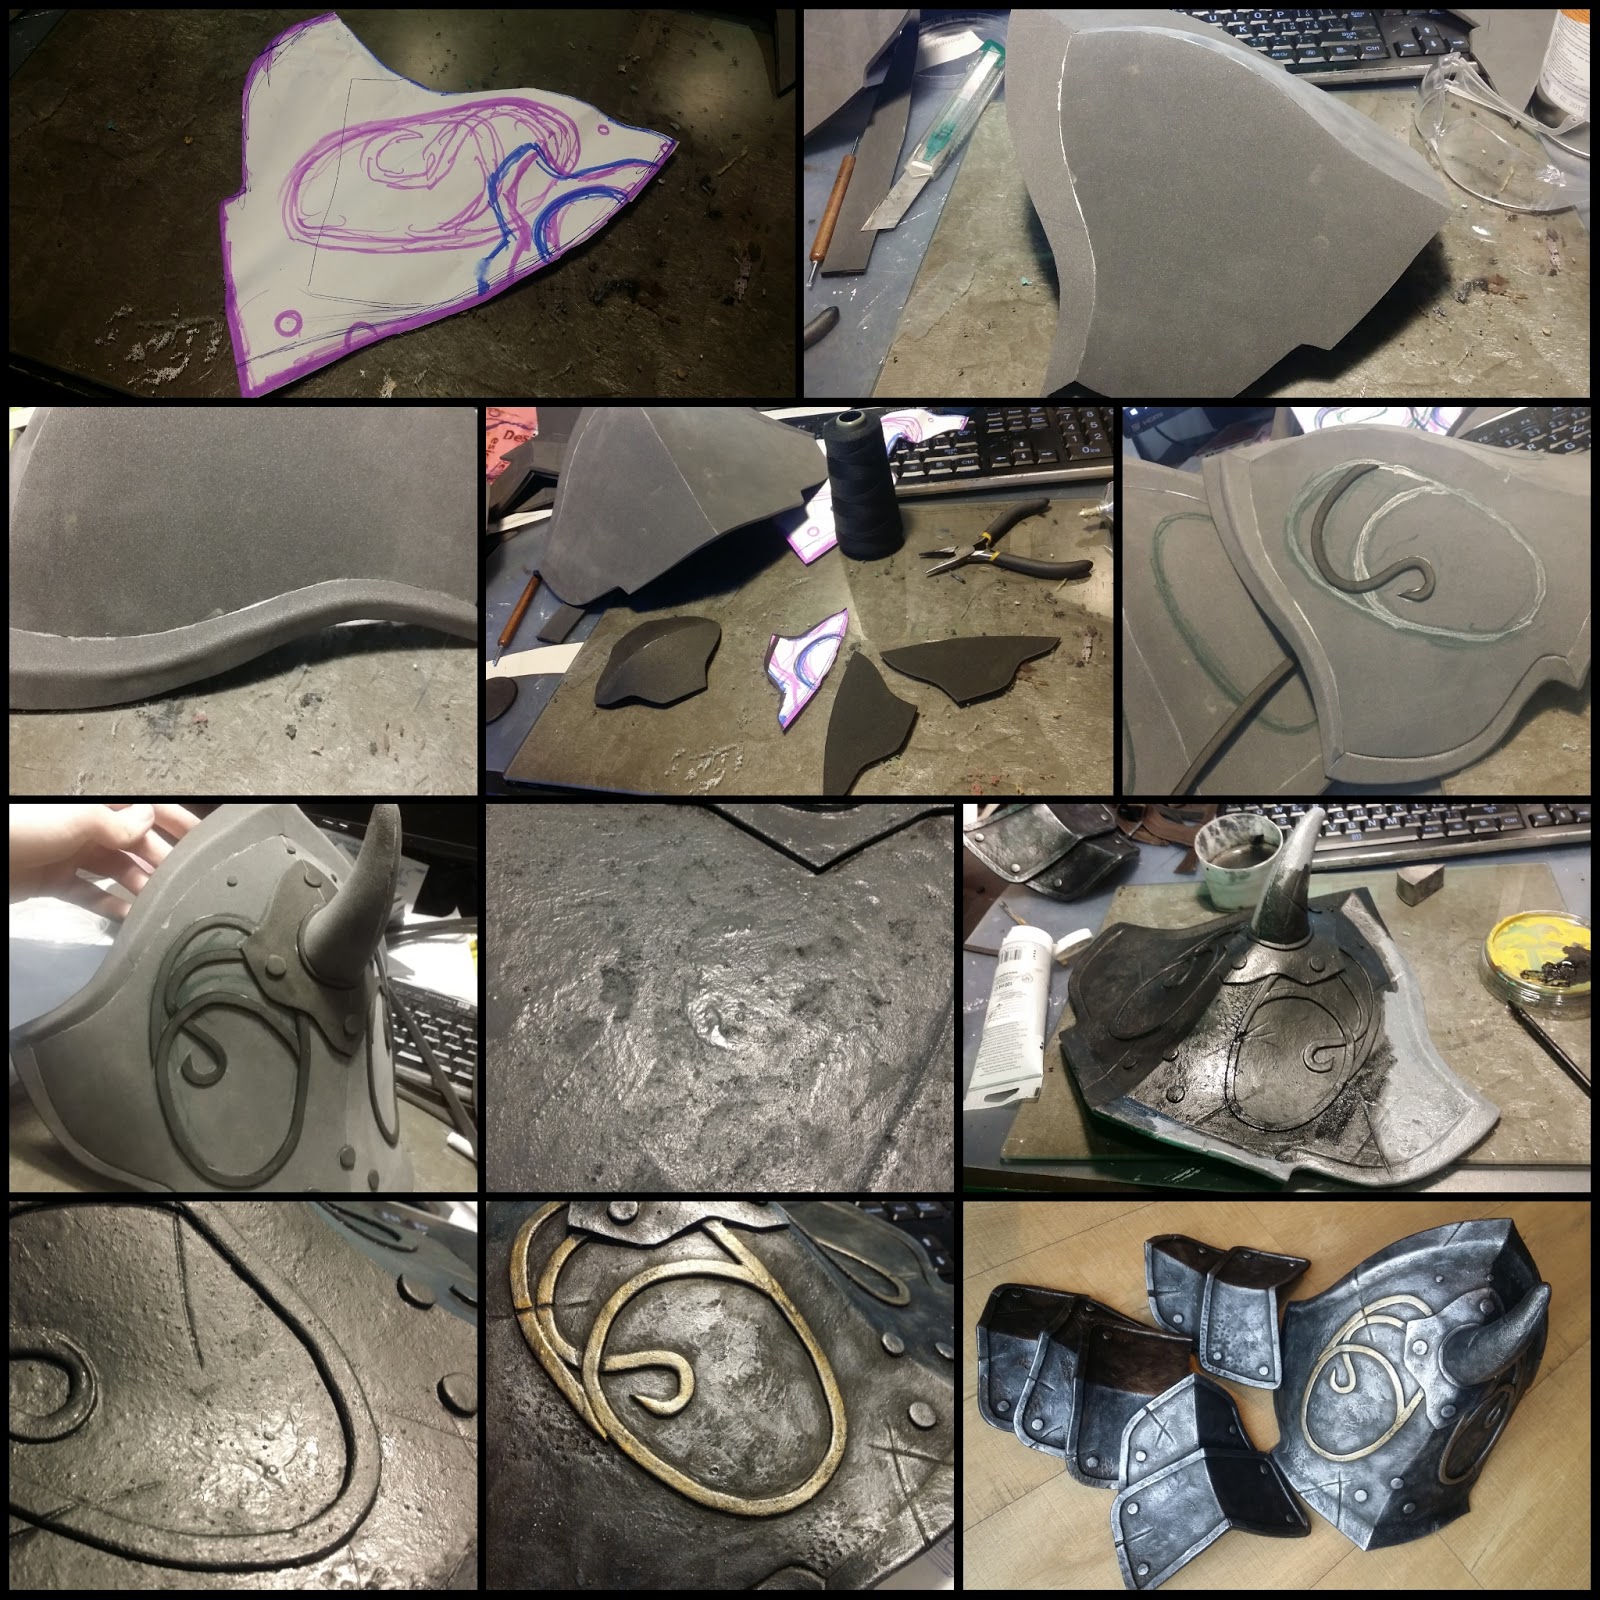
2) The pauldrons
I decided to make the pauldrons according to Apollyon's trailer version, because in comparison with the game design, the pauldrons look more elaborate.


I made the pattern by drawing a half dome shape and connecting and adjusting the paper patterns till I reached the final shape. I transfered it onto 5mm foam from Polyprops and used the same pattern to make a decoration from Moosgummi. For the rivets I use caps from pens to actually cut the round shape from moosgummi, but you can also use round cut irons or just transfer a circle shape onto foam and cut it with scissors.
I made the same on the second pauldron, I just added a guard from two foam pieces on the inner part and I've used smaller caps to cut out smaller rivets from mossgummi.
Then I weathered, primed, painted and rusted the armor pieces. Click the links to see them.


I've found a perfect fabric for the gambeson in a thrift store - it was actually a blanket with shiny fabric from one side and beige cotton from the other. I just added few sewlines, cut out the pattern shape I created by trying a paper on my body from the blanket and sewed 4 pieces of it together while lining all lines to be completelly mirrored.


I made the pattern by drawing a half dome shape and connecting and adjusting the paper patterns till I reached the final shape. I transfered it onto 5mm foam from Polyprops and used the same pattern to make a decoration from Moosgummi. For the rivets I use caps from pens to actually cut the round shape from moosgummi, but you can also use round cut irons or just transfer a circle shape onto foam and cut it with scissors.
I made the same on the second pauldron, I just added a guard from two foam pieces on the inner part and I've used smaller caps to cut out smaller rivets from mossgummi.
Then I weathered, primed, painted and rusted the armor pieces. Click the links to see them.


3) Gambeson


Then I've sewn into the holes for arms also 2 parts, which made sleeves. I decorated borders of the sleeves and bottom part of the gambeson with dark brown fake leather. I also added a collar from brown fake leather with vateline padding fabric.
For closing mechanism I added hooks on the back + velcro strap on the collar.


 I airbrushed the gambeson with dark brown acrylic color in all the lines. Then I modelled and 3D printed small pyramids from PLA, sanded them down and painted them with brown and silver acrylic colors. Then I attached them with second glue on the collar and sleeves.
Then I sewed a little hook made from an elastic band to hold the chainmaille sleeves in place.
4) Padded skirt
I've used the rests of the blanket I've used for the gambeson and created 2 panels, which would form the skirt.Then I added straps from fake leather, sewed them onto the blanket piece and airbrushed the panels with dark brwon acrylics. I glued in the crosses from fake leather the 3D printed pyramids and sewed border around the whole panel.
As a last touch, I made "a princess cut" in the upper part of the panels to better fit on my hips, which made the panels rounder in the upper part.


 The middle part of the skirt is just a panel of chainmaille, which I weaved from rather larger rings to fit the referrence, sewed them onto a black panel of felt and made a border from brown fake leather.
Then I sewed the panels together in the upper corner and made a velcro connection in the opposite corner. The middle chainmaile panel is connected with velcros to the right and left panel.
Here's the livestream video of me making the skirt:
Sledujte hru Apollyon cosplay od uživatele DATgermia na adrese www.twitch.tv
5) Padded pants

 I made a pattern by wrapping myself in a tape and transfered it onto a sandwich from dark brown rough woven fabric and a vateline padding fabric inside. I sewn lines through the sandwich. I made 2 front panels and 2 back panels, which were a little bigger with a bigger cut for my behind.
I followed the cut of the "pant sleeves", that were used in history, so I added two fabric panels and a belt with an elastic band, that I close around my waist.
I also airbrushed the whole thing with black and dark brown acrylic color.
6) Leg armor


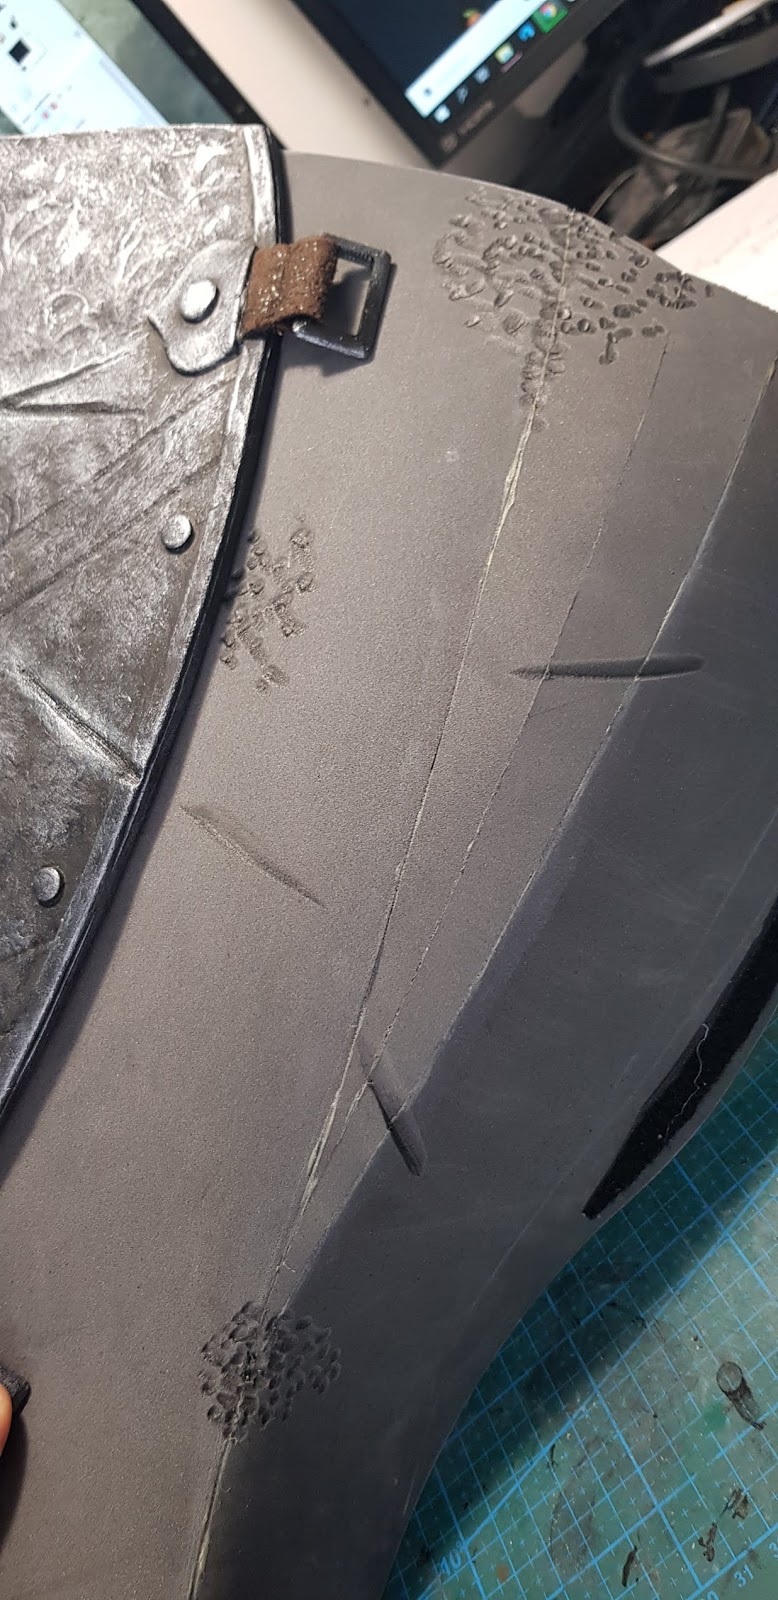
 I started by wrapping my boot around with foil and tape and created a shape from 5 mm foam copying the shape of my boot from the front. I also added 2 arrow shaped pieces for the vamp of the boot. Then I made from 2mm moosgummi the borders of those parts, that I rounded with my dremel. The third part of the leg armor was a copy of the back shape of the boot, that would be connected to the front part and fastened further with fake leather straps, that I made from moosgummi leaf patterns, rivet pushed out of moosgummi with a round felt pen cap and of course, brown fake leather.


I've also added straps to the arrow shaped armor for the vamp of the boot with brass circles from an old bag and brass rivets. The will be fastened with velcros.
I added small pointy pieces to the front part, that I made from foam dowels with knife and dremmel and a lot of moosgummi decrations for the middle stripe and rivets. I amde creases in the armor with my soldering iron.
Then I also weathered, primed, painted and rusted the armor pieces.
I added small pointy pieces to the front part, that I made from foam dowels with knife and dremmel and a lot of moosgummi decrations for the middle stripe and rivets. I amde creases in the armor with my soldering iron.
Then I also weathered, primed, painted and rusted the armor pieces.


I inserted a small velcro in the middle of the front part in the upper area for the knee armor to hold in place.

7) Knee armor
I started with freedrawing a round knee shape pattern, transferred it onto 5mm foam, added curved borders. READ HERE how to make the curved lines without a seam. Then I added a lot of decorations from moosgummi + I created a pointy piece from 2 pieces of curved foam, that I glued together and the curved pointy piece is hollow inside.Then I weathered, primed, painted and rusted the armor pieces.
I added a shorter strap from rubber band, which connects with velcro inside the front part of the leg armor. One fake leather straps goes then around the back of my knee.
8) Belt
 I've made the belt from two black fake leather belts, I painted it with brown leather colors, added brass rivets, found a perfect round brass belt buckle and modelled and printed the round sword holder and painted it brass.
For the tip of the belt, I made a shape from black worbla, added a little weathering with dabbing on the worbla with hot soldering iron and painted it dark silver.
9) Breastplate and backplate

I started with making a foil and tape pattern on my figourine and transfered it to a 5mm foam. I did the same for the backplate. I added straps on the side of the armor with buckles, that I modelled and 3D printed. I made also borders from 2mm moosgummi. The end borders are decorated with making a structure with soldering iron. I started with plain border from moosgummi and than I dabbed the soldering iron with long tip in cca 0,5 cm distance from each other till I created the fluted effect I wanted.

 I also added two buttons on the top of the breastplate from the inside, which will hold the cape on it's place. The buttons were modelled from Apoxie Sculpt on and old button base and painted with black and silver acrylics.
Here's the livestream, where I was making the breastplate and buttons:
Here's the video of me crafting Apollyon's back armor:
10) Gloves

 I started by airbrushing brown fabric gloves darker and making them worn. Then I took a thic white thread and swen into the seams to make the seams look repaired and uneven as on the referrence pictures. Then I further painted the glove with acrylic colors to make the white a little less "shiny" and a little more subtle.
I freehanded the pattern while trying to put all the pieces on my hand (be careful to wear your gloves by trying), I transferrend the finger pieces on two layers of black worbla and shaped them accordingly with heat + added weathering with soldering iron to match the weathering of foam pieces. For the knuckle armor, I made the base from 2mm foam and wrapped it in worbla afterwards. For the palm, it is a plain 5mm foam with moosgummi decorations and soldering iron lines + added weathering. I glued all the pieces to the glove with hotglue, I've primed the foampiece with sealprime and painted all pieces with acrylics.
11) Bracers

 The bracers have a similar structure as a leg armor consisting of two parts connected by velcro + 3 straps.
I started with freehand drawing the pattern on a paper and I transferred it onto 5mm foam. The upper part consist of 2 same parts + 1 back part.
I connected the 2 front pieces together with chemoprene contact glue and I added moosgummi decorations, weathering and fake leather straps. I glued one side of the back part to the front piece and on the other side, I added velcro for closing.


Then I weathered, primed, painted and rusted the armor pieces.


 12) Sleeves

The sleeves are actually just a chainmaille tunnels, that cover Apollyons ellbow area, so I just decided to make two squares from maille, connect two sides together to create tunnels and sew a strap to the upper part, that would fasten around my biceps. And since it didn't really hold well on it's place, I added later a button, that would connect to a rubber band inside the gambeson sleeve.

13) Wig and makeup
I bought an ash gray front lace wig, that had just the perfect color for this project and didn't really need any color changes - it somehow reflects a lot of colors around - sometimes it seems almost black and sometimes almost blonde.
I decided to follow the shape of the helmet with it's mohawk feature by styling my wig. Also since the referrences showcases different sizes of braids, I decided to add two smaller braids on the sides and really small braids under it.
The main braid is the pull through braid with rubber bands type, that stands out more and is more volumous than normal braids, on the sides I've used half braid, to follow the shape of my head and the shapes on the helmet too + really small normal braids for the rest of the hair. I've pulled out in the front a lot of hair, that I cut to mimic the uncombed uncared look, that I invisioned Apollyon could have. And sometimes I think the more "messy" the wig looks, the more convincing the look of Apollyon is.
The makeup is just a combination of dark and light areas, that you create on your face. The magic of old age makeup is to enhance the signs of aging on your face and reverse anything you use on your daily makeup. I apply makeup in a grayish light tone and I shade with contouring set around and mainly under the eyes, I create the jaw line and cheekbone line lot lower than usually, becaus by aging, your face "sinks down" a little, I profound my chin, I shade a lot around my nose to make it look bigger and bulkier. I also apply contour on my eyebrows to make it look less vibrant and less beautiful. The most important part is to creat different faces - smiling, frowning, surprising - and emphasising your wrinkles created by making those faces with darker colors. Dont' forget to conceal also your lip and add wrinkle lines on it too.
When I'm finished, I draw two big scars on my cheek and over my eye (I took inspiration from a helmet pattern from the trailer video) with a eyeshadow and brownish-reddish-pinkish color and put colodium on it (don't put colodium near your eye or on your eyebrows), which makes your skin shrink a little and created scar effect. As a last touch I added a blind lens on the eye with the scar.
If you need some more guidance, there are some useful tutorials about the old age makeup, or you can use latex to create small and convincing wrinkles on your face.
14) Helmet
 The helmet was the most difficult part to make. I reshaped it many times and I was really afraid to create the shape slightly differently than the referrence, which would have destroyed the whole cosplay look, because the helmet is the most noticable part, that basically creates Apollyon as the character.
It is also very hard to keep foam in the needed shape for good, it is not worbla, that stays in the shape once it is cold, it is not 3D printed fixed part. Foam behaves differently, it is very organic and flexible and you get it in the shape just by creating the 2D shapes perfectly and cutting and connecting the in the right angles


 I started with a basic half bowl shape, to which I added 2 foam straps as a cover of the neck area. Then I started making the cover of the eyes, which was the trickiest parts, because of the organic look. Her helmet has a very profound 3D shapes in this area. I astarted with 2 eye pieces, that I connected together. And because the shape wasn't very organic in that stage, I added an inner mask, that I glued not only to each other - I glued the upper part of the mask AROUND the corners of the inner mask too, so it created the shape on the left as a result. Then I just sanded down all the borders, added foamclay in the areas, where inner and outer mask connected to fill in those places with mass and make it look more organic.
 The mouthplate were just 2 pieces of foam connected together. Then I decorated the whole mask heavily with small moosgummi snakes, I made the eyes with burnt holes from moosgummi and underglued them with meshed fabric so my eyes won't be visible. I've burnt holes inside the mouthplate too with soldering iron and covered it with meshed fabrics too. I added a mohawk on the helmet made from 2 halfmoon shapes from 5mm foam, covered all the borders with moosgummi and decorated it again with moosgummi snakes.
Here's how I made the decorations:

 Then I weathered the whole helmet with dremel and primed it with seal prime making a texture on the way.
Then I weathered, primed, painted and rusted the helmet using the tutorials described in the links.
I applied the rust specifically to mimic the referrence pictures I got from the game:


 14) Sword

I've already written a full sword tutorial, you can find it HERE.

 |
| Photo: Danimaginarium |
And here are some useful links you can use for your Apollyon build:
I hope you like my turn on this character and my guides will help you create something incredibilis!
If you happen to use some of my patterns/models/files/ideas, don't forget to give credit!
 | |
|
If you like my work and you'd like to see more articles and tutorials like this, you can support me on my PATREON PAGE
because donations of my patrons made this tutorial possible.
Yours
Germia

0 komentářů:
Okomentovat